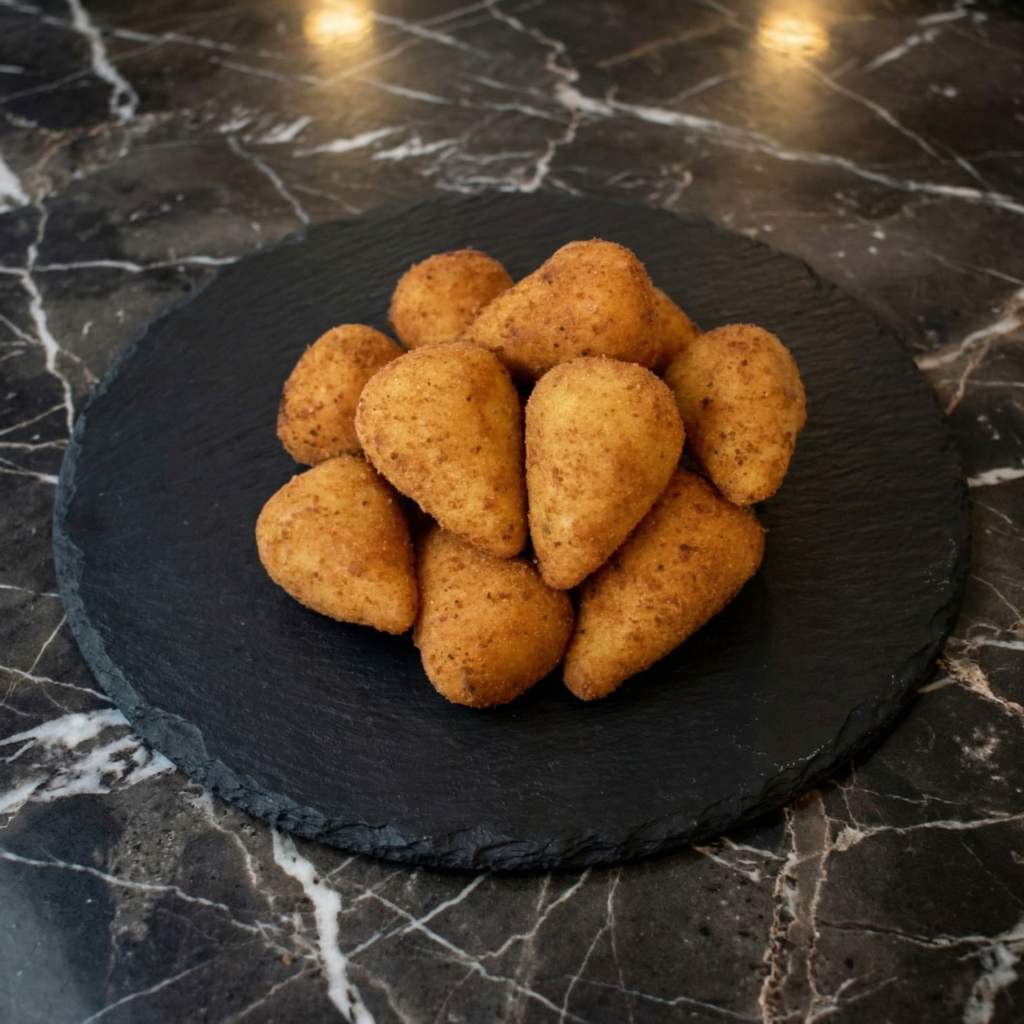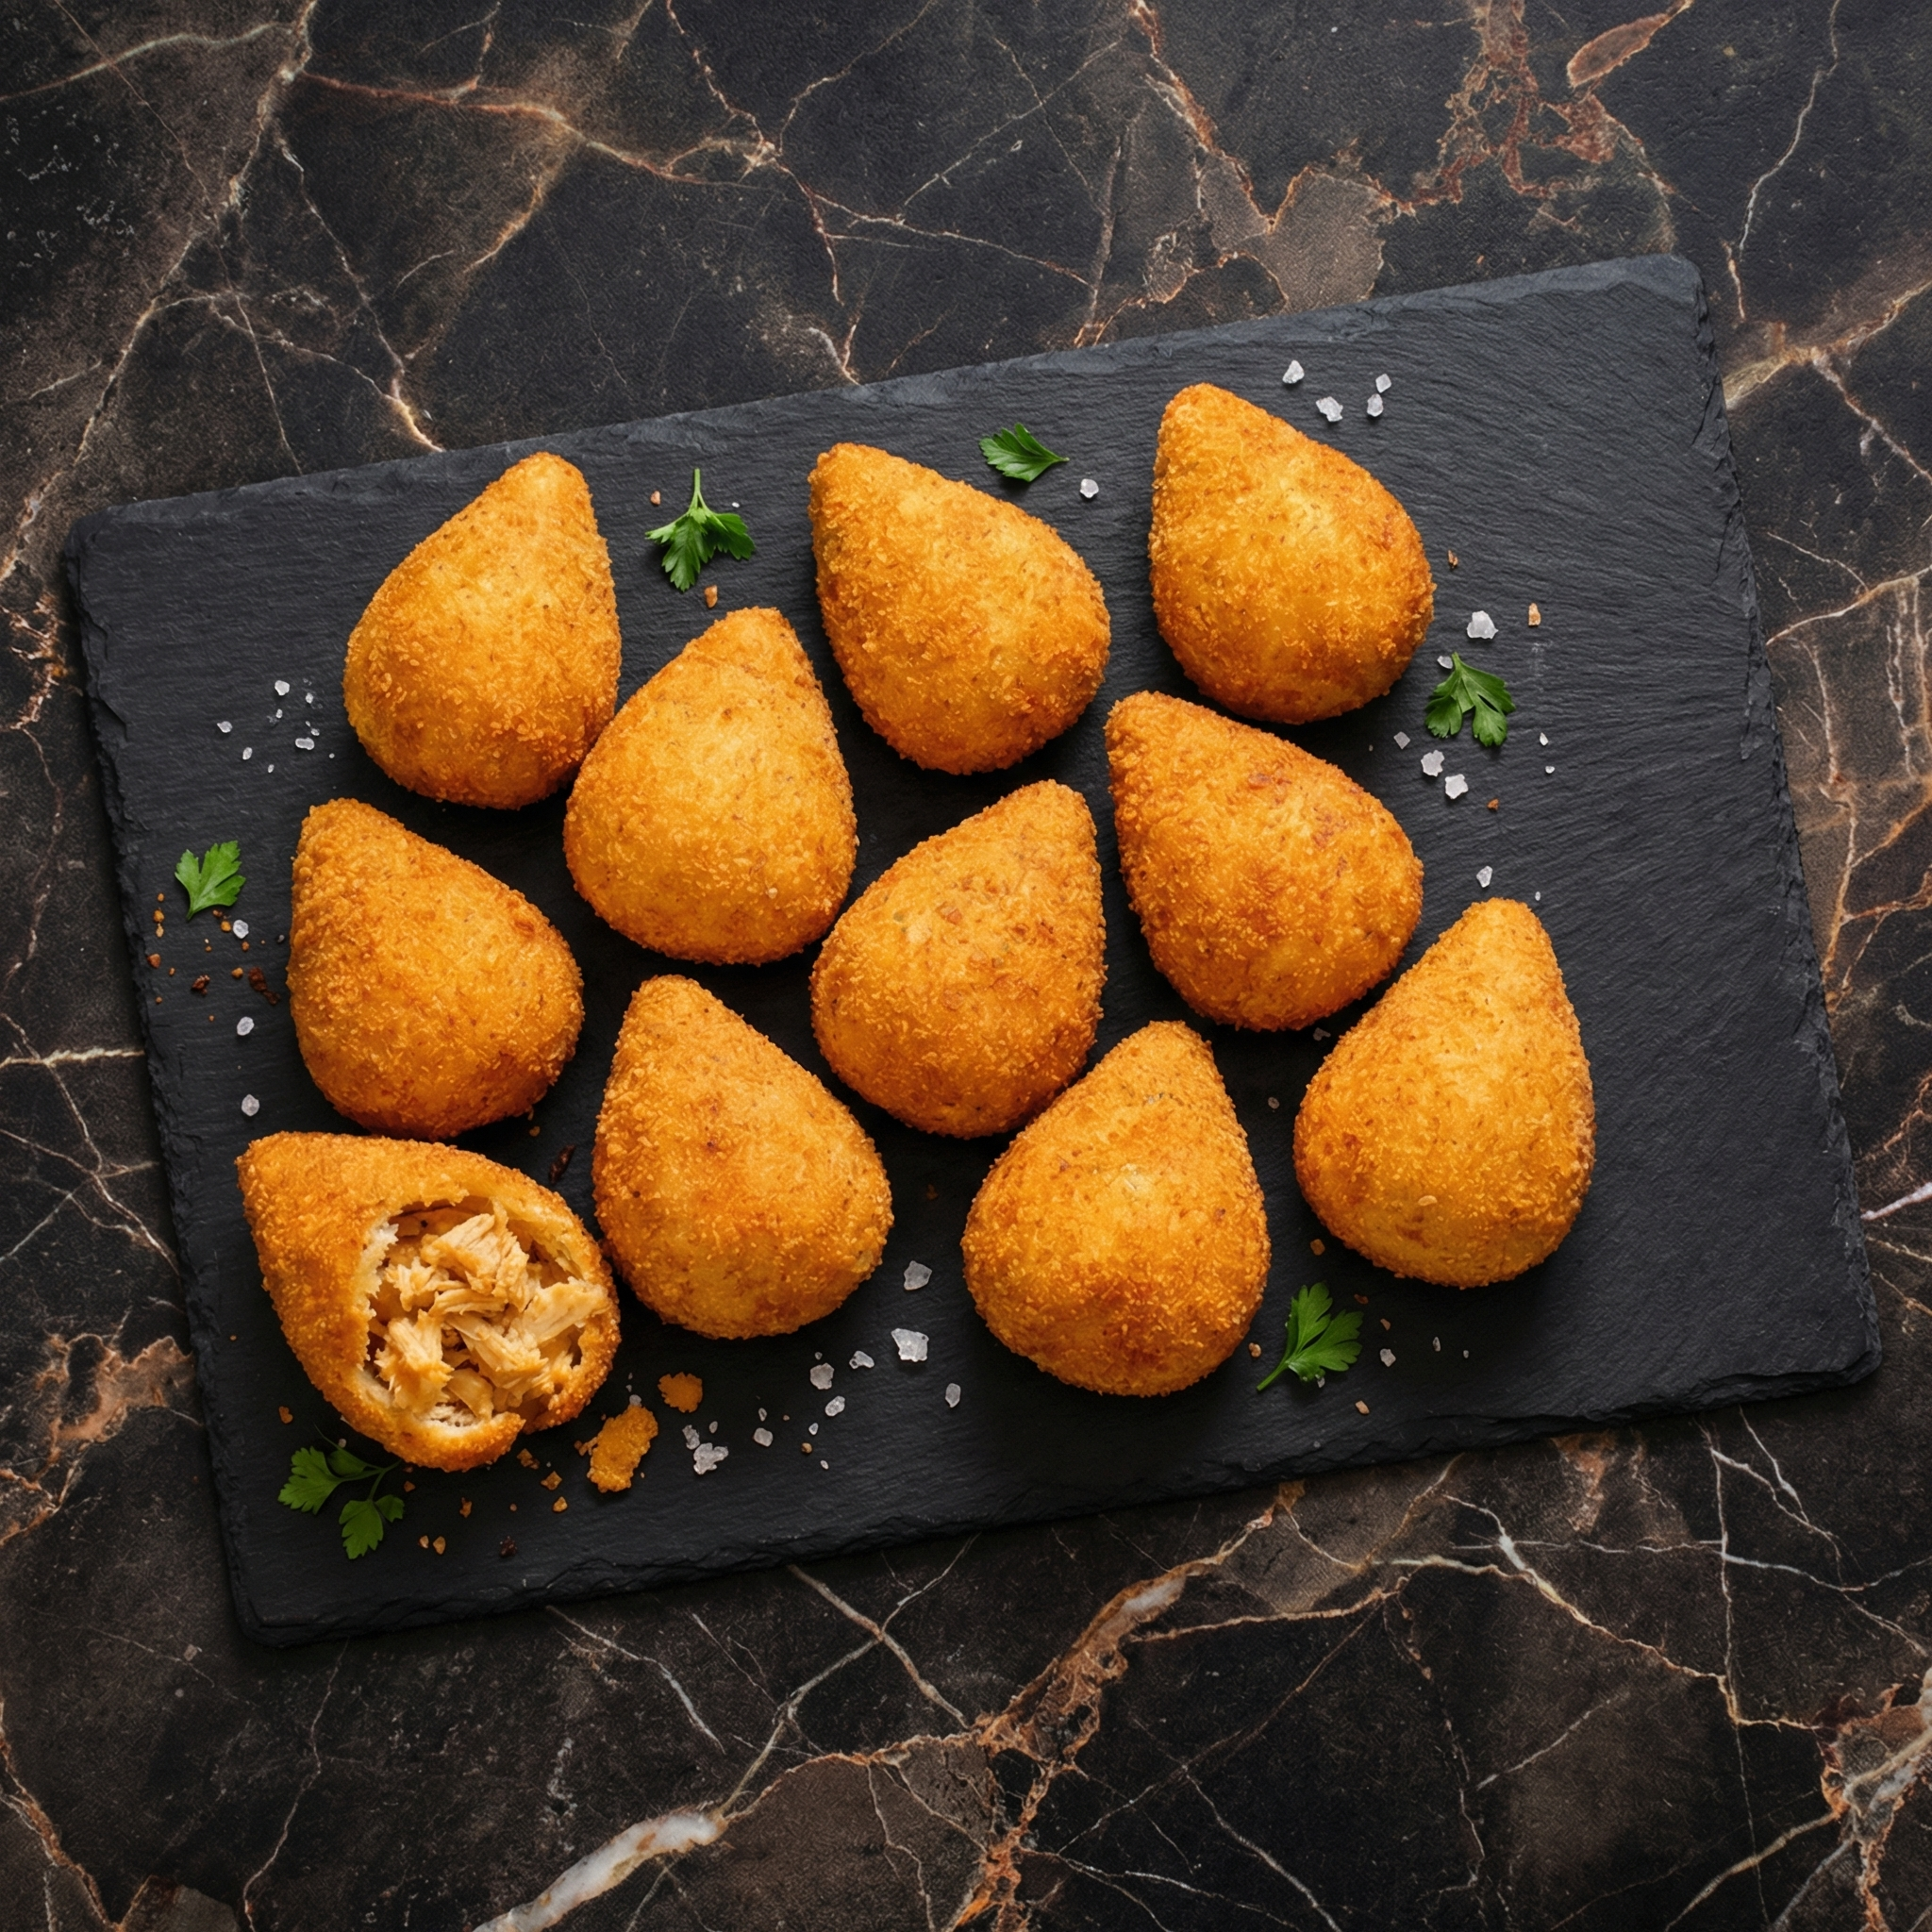
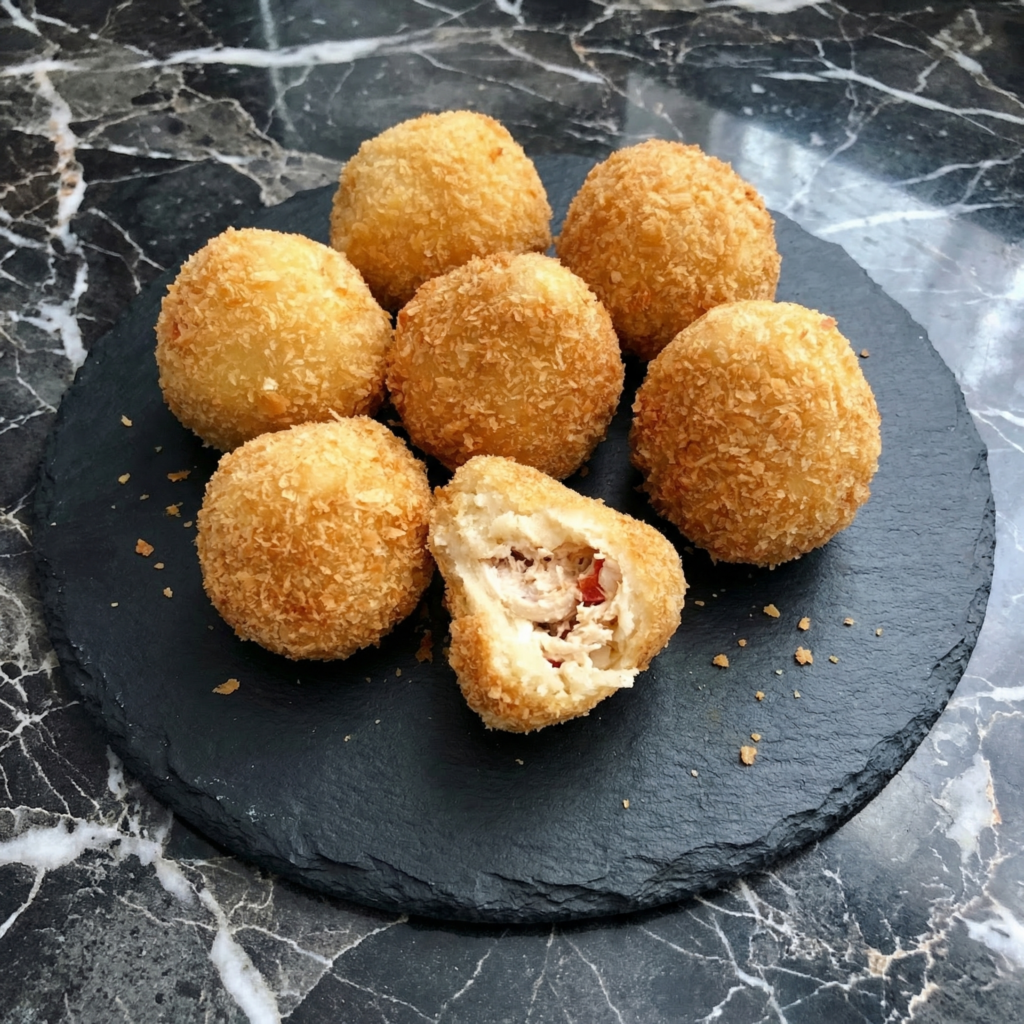
Coxinha are Brazil’s gift to the snack world. Tear-drop shaped croquettes with a creamy, shredded chicken filling, often wrapped around a nugget of catupiry cheese, then breaded and fried until golden and crisp. They’re the star of every Brazilian party, the snack that disappears first, the thing you crave when you’re homesick for Brazil—even if you’ve never been.
Making coxinha at home is a labor of love, but it’s deeply satisfying. The dough is a simple, velvety chicken-flavored pastry. The filling is rich and creamy. And that shape? It’s iconic. With a little practice, you’ll be shaping perfect coxinhas that rival any Brazilian bakery. Make a batch for your next gathering and watch them vanish.
Cook the Chicken
- Place chicken breasts in a pot with quartered onion, smashed garlic, bay leaves, and salt. Cover with water.
- Bring to a boil, then reduce heat and simmer for 15-20 minutes until chicken is cooked through.
- Remove chicken and reserve 2 cups of the broth for the dough. Let chicken cool.
Make the Filling
- Shred cooled chicken finely with two forks.
- In a skillet, heat olive oil over medium heat. Add chopped onion and cook until softened, about 3 minutes.
- Add minced garlic and cook for 30 seconds until fragrant.
- Add tomato sauce or paste and cook for 2 minutes.
- Add shredded chicken, stir to combine, and cook for 3-4 minutes.
- Remove from heat. Stir in cream cheese (or catupiry) and parsley. Season with salt and pepper.
- Let filling cool completely. If using cheese centers, cube cheese and set aside.
Make the Dough
- In a large saucepan, combine reserved chicken broth, butter, and salt. Bring to a boil.
- Add flour all at once and stir vigorously with a wooden spoon. The dough will come together into a ball.
- Cook for 2-3 minutes, stirring constantly, until the dough pulls away from the sides of the pan and forms a smooth ball.
- Transfer to a bowl and let cool until handleable.
Shape the Coxinhas
- Lightly oil your hands to prevent sticking. Take a portion of dough (about 1½ tablespoons) and flatten into a disc.
- Place a spoonful of filling in the center. If using cheese centers, place a cheese cube inside the filling.
- Carefully wrap the dough around the filling, sealing completely. Shape into a tear-drop (pear shape) with a pointed end.
- Place shaped coxinhas on a baking sheet. Repeat with remaining dough and filling.
- Refrigerate for 30 minutes to firm up (this helps the breading adhere).
Bread the Coxinhas
- Set up a breading station: beaten eggs in one bowl, panko in another.
- Dip each coxinha in beaten egg, letting excess drip off.
- Roll in panko, pressing gently to adhere. Coat evenly.
- Return to baking sheet and refrigerate for another 15-30 minutes (optional but helpful).
Fry the Coxinhas
- Pour oil into a heavy-bottomed pot or Dutch oven to a depth of 2-3 inches.
- Heat oil to 350°F (175°C). Use a thermometer for accuracy.
- Working in batches, carefully lower coxinhas into the hot oil. Don’t crowd the pot.
- Fry for 3-4 minutes, turning occasionally, until golden brown and crispy all over.
- Remove with a slotted spoon and drain on a wire rack (not paper towels).
Serve Immediately
- Arrange coxinhas on a platter. Serve with lime wedges and hot sauce.
- Take a bite. Crispy, golden shell. Creamy, savory filling. This is Brazil in a bite.
Summary
Prep Time: 45 minutes | Cook Time: 20 minutes | Chill Time: 1 hour | Total Time: 2 hours
Yield: 20-24 coxinhas
Difficulty: Labor of love (worth every minute)
Storage Notes
Leftovers:
Store cooked coxinhas in an airtight container in the fridge for up to 3 days. Reheat to restore crispiness.
Reheating (Bring Back the Crunch):
Oven or air fryer (best): 375°F for 5-7 minutes until hot and crispy. Microwave: Not recommended—makes them soggy.
Freezer-Friendly (The Dream):
Freeze uncooked, breaded coxinhas on a baking sheet until solid, then transfer to a zip-top bag for up to 3 months. Fry from frozen—add 1-2 minutes to cooking time. No need to thaw.
Make Ahead:
Filling can be made up to 3 days in advance. Dough can be made a day ahead and refrigerated. Shape and fry just before serving for maximum crispiness.